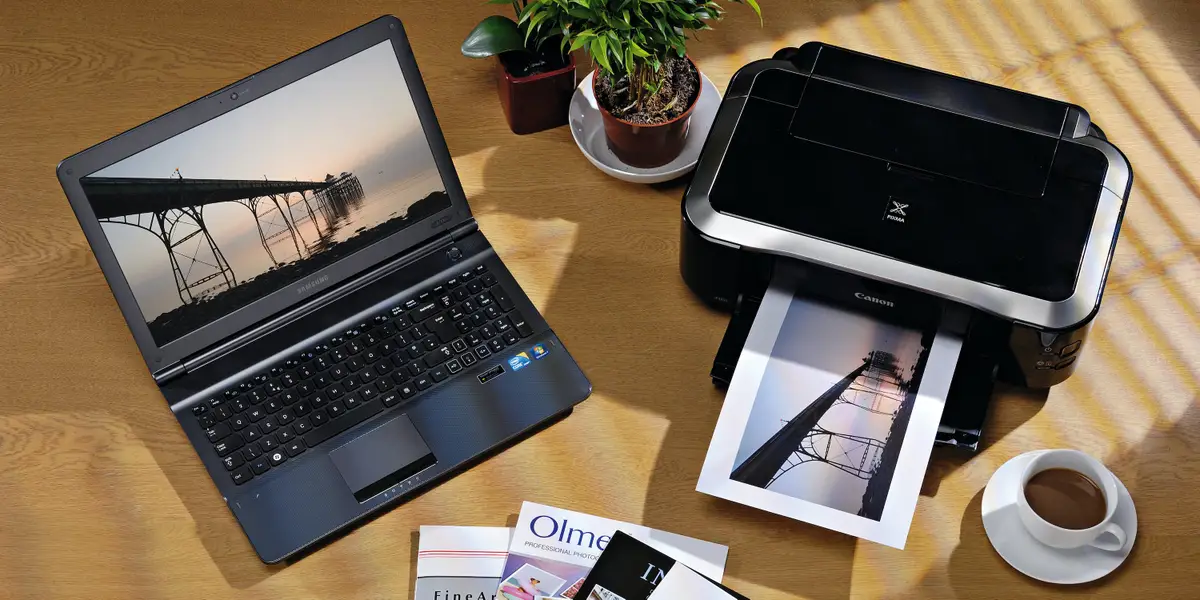
A printer can be explored to its maximum potential when connecting it to a network-enabled device, such as a laptop, smartphone, or tablet. If you have recently bought a wireless printer, you should learn how to connect the printer to your laptop through wired and wireless means. The wireless setup requires no wired connection, and hence, you can avoid the clutter of wires around you.
On the other hand, a wired connection between your printer and laptop makes sure that nothing interrupts the communication. So, there are two ways to connect a printer to your laptop: wirelessly and via a cable.
Let’s check out how you can connect properly between your laptop and printer.
Method 1: Connect your Printer wirelessly to your Laptop
To make the wireless printers connect to any device wirelessly, they should be on the same network to which other network devices are connected. For example, if you are using a wireless network in your home, your wireless printer should connect to the same wireless network.
A few steps of the wireless connection between your laptop and printer might vary depending on the brand of printer and laptop. Otherwise, the overall wireless connection procedure is the same.
Connect your Wi-Fi Printer to the Wireless Network
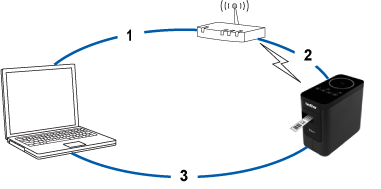
Turn on your wireless router, Wi-Fi printer, and laptop. Head towards the wireless setup settings from the control panel of the printer. If you are using an Epson printer, the same option is available under the Setup option. If it’s an HP printer, simply go to the Network option on the Control Panel.
Meanwhile, the printer should show all the nearby wireless connections. Choose the SID of the wireless network that you want to connect your printer to. Make sure that you provide the password of the wireless network carefully. When the printer achieves the wireless connection, the wireless light should turn on.
Connect the Printer to the Laptop
The next step is to configure your wireless printer to your laptop. We are assuming that you are using a Windows device. However, the configuration between the laptop and printer can be different according to the Windows version.
How to Add a Printer to Your Windows 7 or Windows 8 Laptop?
Here are the necessary steps to connect your wireless printer to your Windows 7/ 8 laptop:
- Click the Start menu followed by the Devices and Printers option.
- Choose the ‘Add a printer’ option.
- Under the wizard named Add Printer, choose the ‘Add a network, wireless or Bluetooth printer’ option.
- A list of available devices should appear, and you need to click on the name of your printer.
- Continue with the Next button. Windows might prompt you to install the necessary driver for your printer. If it does, you have to go for the Install Driver option.
- Go through the on-screen instructions carefully to complete the driver installation.
- Finally, you can hit the Finish button when it’s over.
What about a Windows 10 or Windows 11 Laptop?
If you own a Windows 10 or Windows 11 laptop, then you have to follow the steps below:
- Ensure that your printer is turned on.
- Press the Windows key from the keyboard and select Settings from the menu.
- Click on the Devices section and when it expands, choose Printers & Scanners from the left pane.
- On the right pane, click the ‘Add a printer or scanner’ option. A list of printers might appear, and you have to choose your printer from them.
- Opt for the ‘Add Device’ option, and Windows will automatically connect to your printer.
- Then, Windows will prep up the driver installation for your printer and ask you to install the necessary printer drivers.
- An option called ‘Get App’ might appear on the screen, and you have to click on it. This will download and install the necessary tool to print wirelessly.
Thus, you can connect a printer to your laptop wirelessly.
Method 2: Make a Wired Connection between your Laptop and Printer
Wireless connections might fluctuate from time to time, and that’s why numerous users prefer going for wired connections. You can connect your printer to a laptop via that cable if you have the right printer cable.
Here’s what you need to abide by to establish a successful wired connection between your printer and your existing laptop.
Check the Printer Cable Type
You have to determine the cable for connection after you are sure of the port types of your laptop and printer. Three types of printer cables are commonly used: parallel printer cables, USB printer cables, and serial printer cables.
Your printer might have come with a dedicated printer cable for use. You can try that or purchase a different compatible cable according to the port type of your computer.
Plug the Cable into Both the Devices
Since you have the right type of printer cable, turn on both your primer and laptop. Plug the cable into your laptop and connect the same cable to your printer. Once you connect them, your Windows laptop will readily detect the device. Additionally, it will start downloading compatible printer drivers. After it stops installing the printer driver, you can use your printer.
If you stumble upon any printing hiccups, this might be caused by an outdated driver. Go to the official support site of the printer manufacturer and download the latest printer driver from it.
What if Windows doesn’t Recognise your Printer While Configuring Wirelessly?
Users have reported that they have encountered this issue. To troubleshoot this, go to the Printers & Scanners option through the Search option. Choose the ‘Add a printer or scanner’ option.
After that, opt for the ‘The printer that I want isn’t listed’ menu. Under the printer box, choose ‘Add a Bluetooth, wireless or network discoverable printer’. Hit the Next button and select your printer. Again, click the Next button, and Windows will finish setting up your printer wirelessly.